How To Screenshot On Windows 10
I’ll show you several ways to take a screenshot on Windows 10. A screenshot is when you create an image of what is on your screen. This can be useful to show someone exactly what you are seeing or to save what you see for your record.
Take a Screenshot with your Keyboard
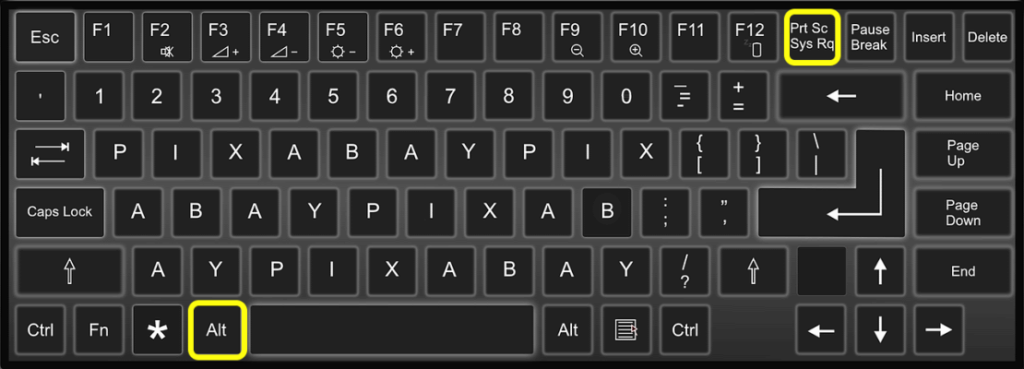
Method #1 Use the (Print Screen) Button
- Press the (Print Screen) button on your keyboard.
- You can now paste (Ctrl+V) this into your document or whatever application you are wanting to put this image.
- Or paste it into an image editor and save it as an image file.
Method #2 Use the (Alt + Print Screen) Buttons
- While holding the Alt key, press the Print Screen button. This will copy only the selected window and not your entire screen.
- Now paste (Ctrl+V) into the document or application, just like you did in method #1.
- Paste into an editor to save as an image file.
Method #3 Use the Snipping Tool
Select the Start button, type snipping tool in the search box on the taskbar, and then select Snipping Tool from the list of results.
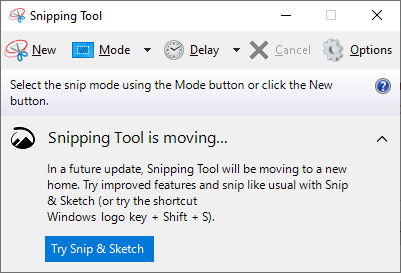
- Press “New” in the snipping tool.
- Use your mouse to select what you want to copy.
- Make any edits (draw, highlight, erase) to the capture.
- Save the screenshot.
Method #4 Use a Screen Capture Software
You can install a 3rd party software of your preference. Some are paid software, but many are free. Below are just some you can try out.
Bonus: Enable the (Print Screen) button to open snipping tool
- Select the Start button, click on the Gear icon for settings.
- Select Ease of Access, then Keyboard on the left pane.
- Scroll down to the Print Screen shortcut section and turn on “Use the PrtScn button to open snipping”

Now when you press the PrtScn button on your keyboard, it will open the Snipping Tool.
There you have it, a few ways you can take a screenshot on Windows 10.