How To Organize Your Data For Backups
Having backups of your important files are key to protecting this data. But just as important is how you organize your files. Having some type of structure to your files/folders will help you when you are looking for a specific file(s).
Below are some steps to guide you to better organize your files.
1. Analyze Your Data
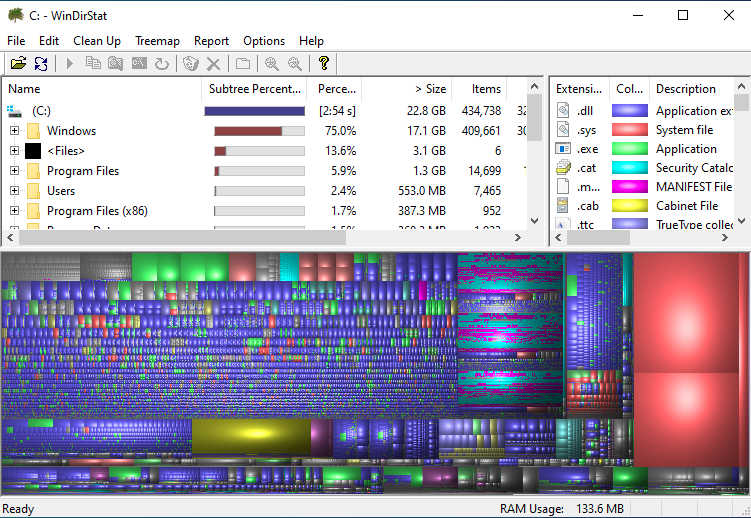
Using disk analyzing software to help you view and clean up your files. These types of tools will scan your hard drive and list the top files/folders that are using space. There is also a graphical representation of disk usage, which I find very useful to see large files.
- Windows – WinDirStat or WizTree
- Linux – QDirStat (rewrite of KDirStat)
- Mac – Disk Inventory X or GrandPerspective

2. Create Buckets
Let’s say you are a photographer, you may have thousands of image and video files in your library. Or perhaps you a writer and store many types of documents on your computer. Creating some type of folder structure, based on your workflow will help keep files organized.
I create top level folders with sub folders that make sense for me.
- Documents – I create folders for products I own (Vehicles, TVs, Cameras, Cell Phones, etc..), using the format: YYYY Make Model. Example: 1989 Toyota Pickup I put all files related to that product (manuals, issues, settings).
- Pictures – I create a folder for each year (2021, 2020, 2019, etc). Then under each year, I create a folder starting with YYYY-MM-DD format, then event name. Example: 2021-05-15 Mom’s Birthday
- Secure – This folder is for highly sensitive information like income tax or medical records. You should also increase security on this folder by restricting access permissions.
- Other – This is for anything else that doesn’t fall into the above categories.
I store all my files on a NAS (Network Attached Storage). <– (affiliate link) These are great as central storage to all of my computers.
3. Determine Your Backup Method
Manual Backups
If you are good at following a process and you do it every time, then manually backing up can be a good method for you. Have a defined schedule and keep to it.
You can use external storage to make your copy/backup:
- USB Hard drives
- Flash drives
- Discs
Automatic Backups
The easier way for me is to use free/paid software that will automatically backup your data. Once installed and configured, your files will be automatically backed up. This can be real-time, so as you save a file, it also makes a copy to their cloud storage. Or you can schedule it to backup on an interval, like once per day.
Free Options – with paid options for increased capacity
- iDrive – (5GB free)
- OneDrive – Microsoft’s service (5GB free)
- iCloud – Apple’s service (5GB free)
- Google Drive – Google’s service (15GB free)
- Dropbox – (2GB free)
Paid Options
4. Verify Your Backups
The last step is to make sure that your files are being backed up. Make sure that you can access your copy of your files. Log in to the service you are using and try downloading some of your files to verify they are intact.
Closing
Organizing your files for backups is an important step in keeping your files easily accessible. It will help you with finding files when you need them. As well as reducing stress when there is pressure to find something.
Related Posts:


